My latest watercolor painting was inspired by an Instagram post by my friend, photographer Natalie Moser. It is a pic of her son on a Southern California beach at sunset:
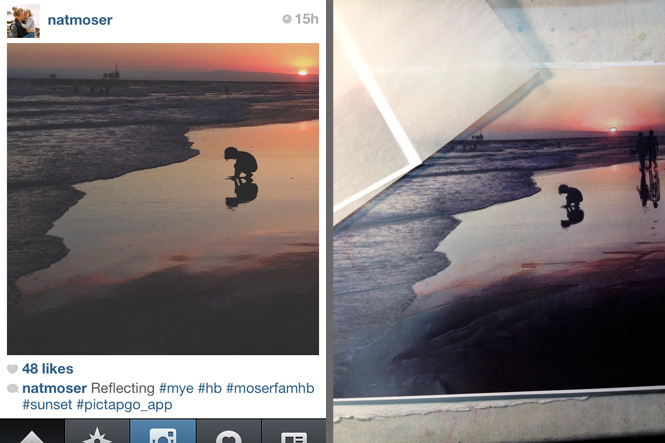
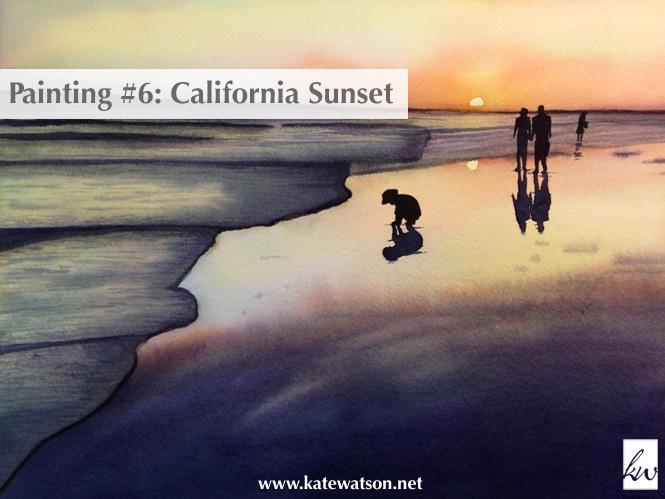
I asked Natalie if she was ok with me painting it and she sent along the full-size, original iPhone image for inspiration. Because she actually has two children and a loving husband, when I reworked the image for watercolor, I included the whole family:
If you’re curious how the painting came together, here’s an animated gif. At the end of the post, I’ll also talk you through it:
Occasionally I get asked why I don’t sell my paintings.
Reason #1: I’m a beginner! This is literally my sixth painting since I began painting watercolors and taking class with Guy Magallanes. I have a long way to go before I’d feel like my work was saleable.
Reason #2: Painting is just for me. As anyone who’s turned a creative pursuit into a profession knows, there’s a difference between creating for yourself and creating for others. Being a professional artist may be fun but it is different and, for now, I need painting to be just for me.
So there you have it. On to my California sunset painting, step-by-step:
- The first step in any painting is to trace the major features of the image onto watercolor paper. I started there.
- Then I added transparent yellow and permanent rose, painted wet on wet, in the sky and sand.
- I put on a tiny bit of liquid frisket to keep the sun and its reflection light.
- From a combination of permanent rose and hookers green, I created a brownish neutral to delineate shapes in the water and painted it on dry followed by a pass of a clean damp brush to soften the edges.
- Added some thalo blue to the water, wet on wet.
- Then I decided to add some winsor orange (red shade) to increase the vibrancy in the sky and water, again wet on wet to ensure softness across the sky.
- Added two more passes of thalo blue to the water and sky, wet on wet.
- Another pass of transparent yellow, wet on wet.
- To determine if I was satisfied with the image vibrancy, I started adding a dark neutral mixed from permanent rose, thalo blue, and hookers green, painted on dry and then softened.
- I added several passes of winsor violet for contrast and depth, again painted wet on wet.
- Next I went back to my creamy dark, added some violet, and painted the foreground wet on wet.
- Once satisfied with the foreground, I added texture to the water with a little bit of the dark neutral, painted on dry and softened with a damp brush.
- After one more pass of the neutral to darken the water, it was time to remove the frisket and add the people.
- Wet on dry, I painted in all the people and their shadows, softening the shadows and adding some stray ripples in the water and sand.
And that’s it, folks. Any more questions for me about painting watercolors?
Until next time,


Kate Watson - Sure!
John Rorer - I love it. May we use it for a wine label?